The Art of Application: A Comprehensive Guide to a Step-by-Step Makeup Routine
Related Articles: The Art of Application: A Comprehensive Guide to a Step-by-Step Makeup Routine
Introduction
In this auspicious occasion, we are delighted to delve into the intriguing topic related to The Art of Application: A Comprehensive Guide to a Step-by-Step Makeup Routine. Let’s weave interesting information and offer fresh perspectives to the readers.
Table of Content
The Art of Application: A Comprehensive Guide to a Step-by-Step Makeup Routine
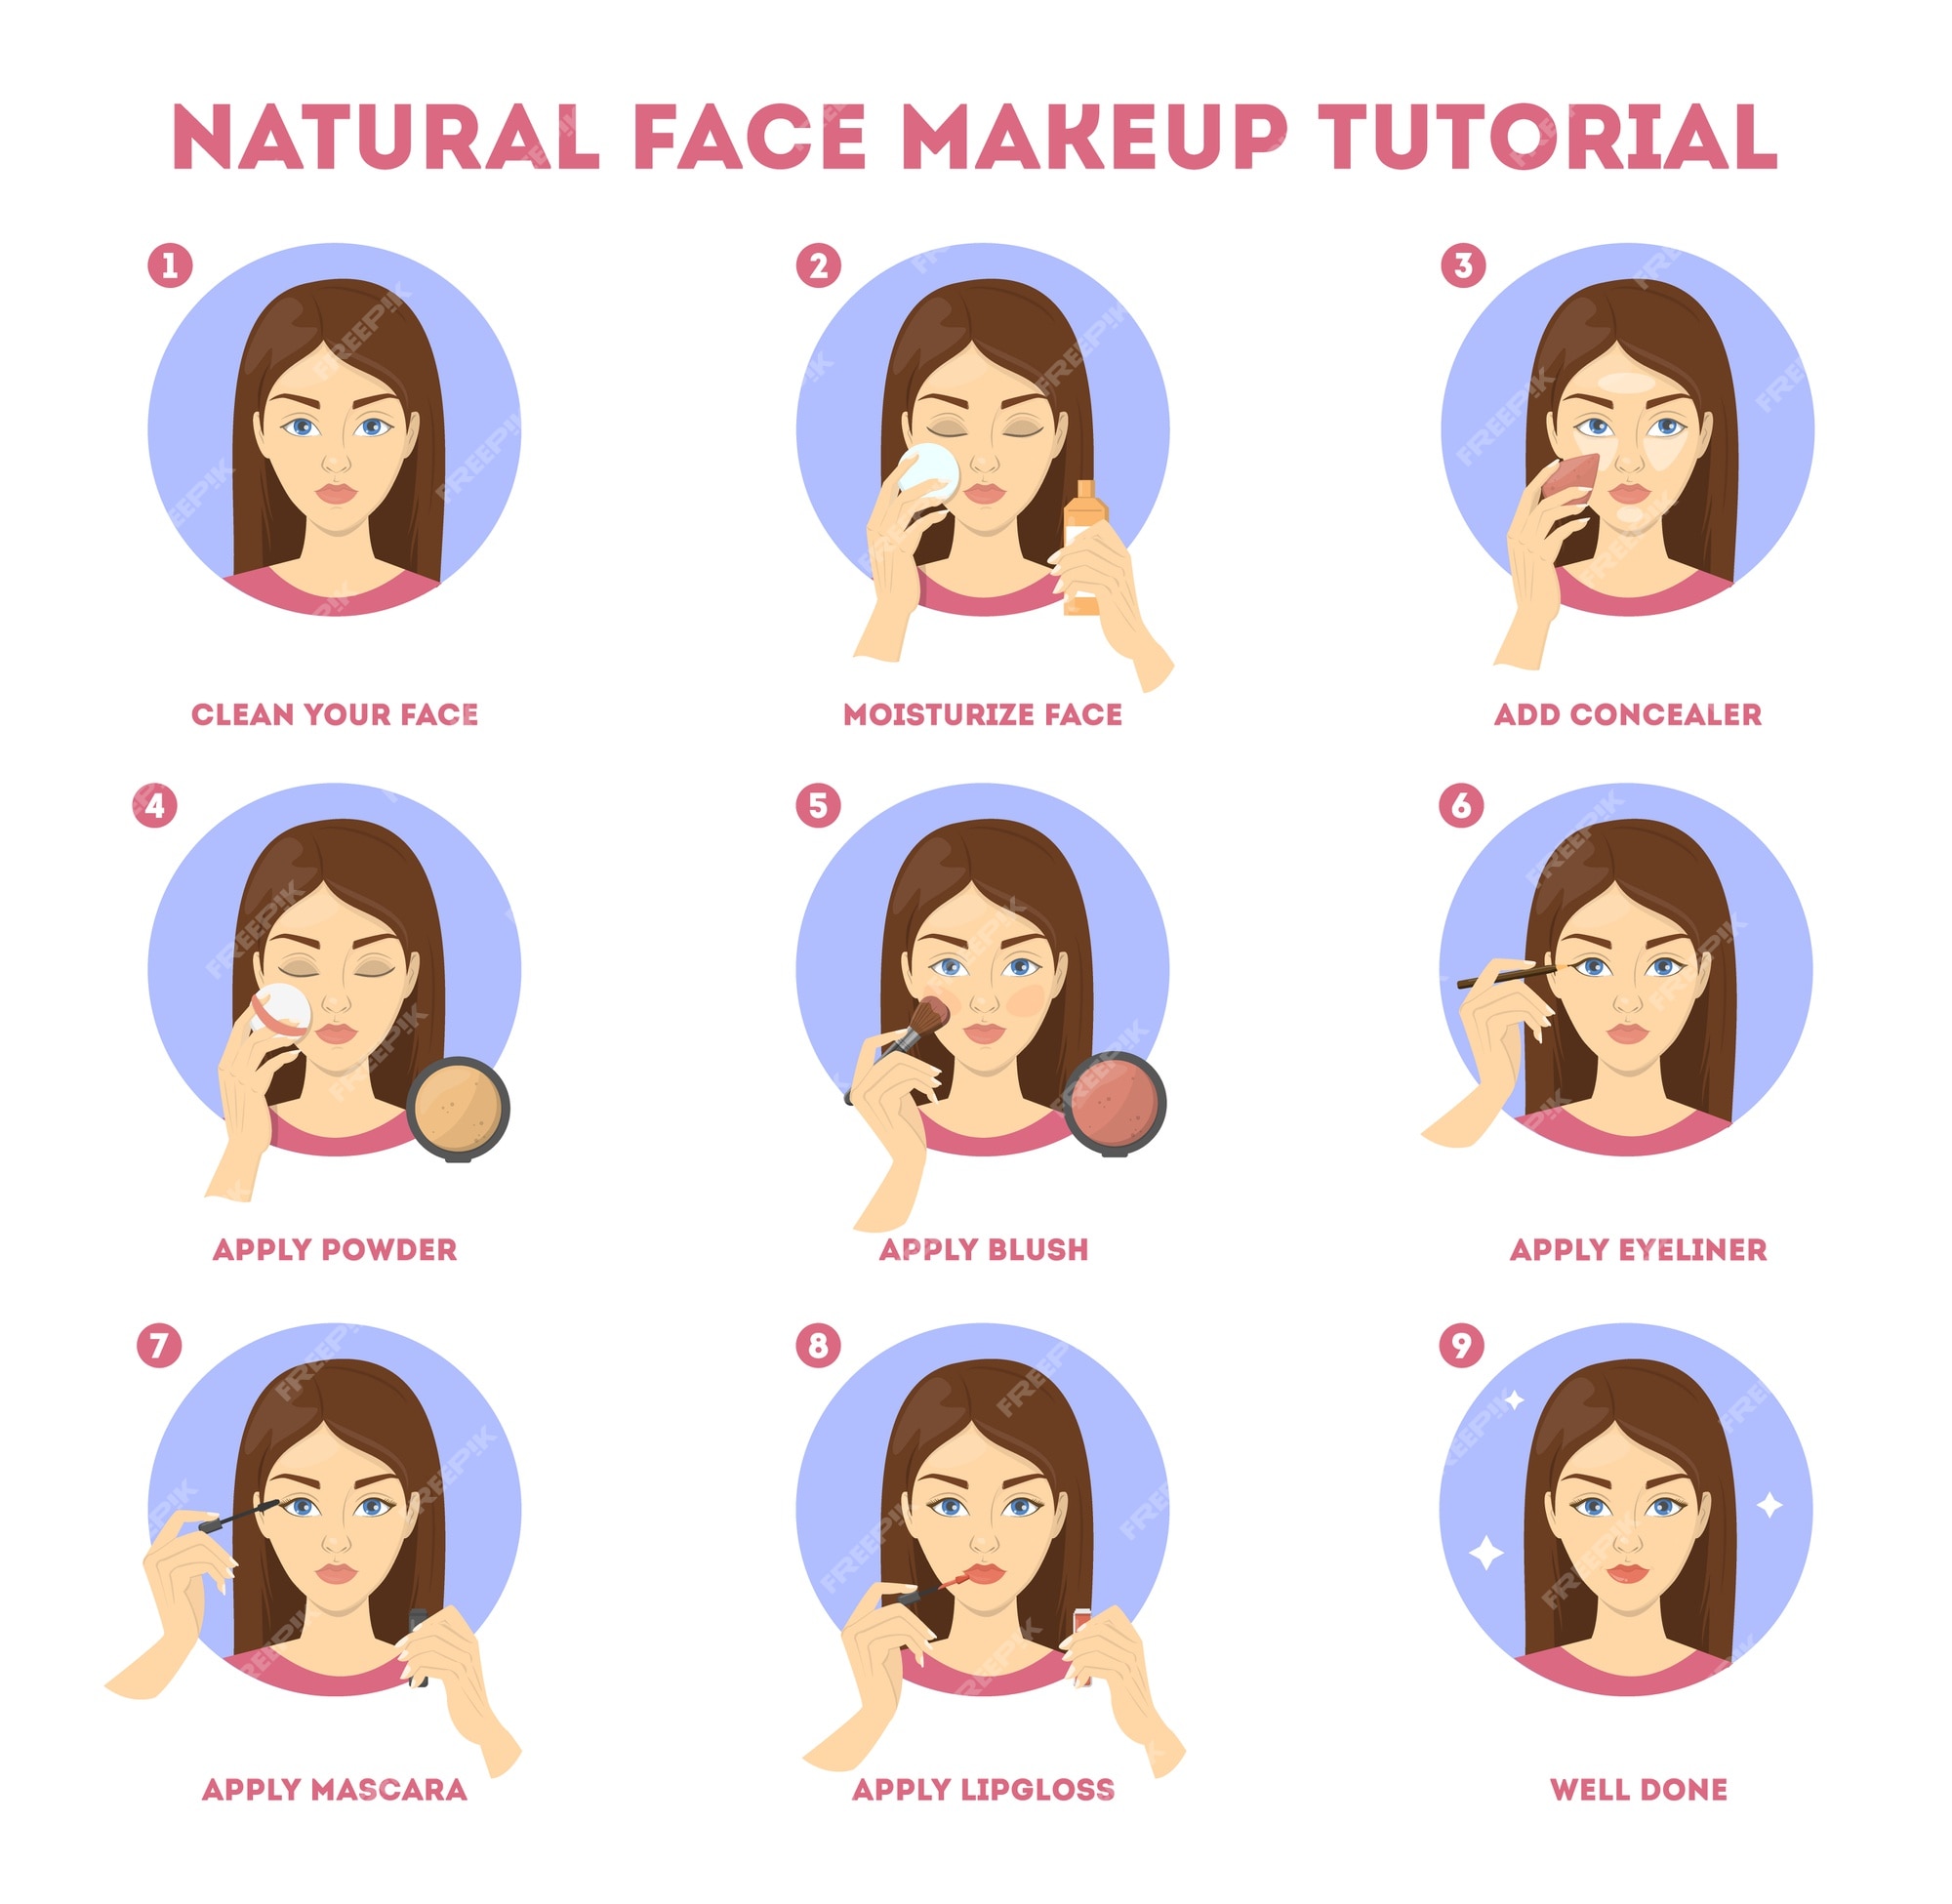
Makeup, a powerful tool for enhancing features and expressing individuality, requires a structured approach for optimal results. A well-executed makeup routine, when undertaken step-by-step, yields a polished and confident look. This comprehensive guide will delve into the essential steps, offering insights into the nuances of each stage, and highlighting the benefits of a methodical application.
Step 1: Skin Preparation – The Foundation for a Flawless Finish
Before embarking on the application of color, a solid foundation is crucial. This involves preparing the skin for makeup, ensuring a smooth canvas for optimal results.
Cleansing and Exfoliation:
- Cleansing: Begin by removing dirt, oil, and impurities with a gentle cleanser suited to your skin type. This step removes any residue that may interfere with makeup application and promotes even product distribution.
- Exfoliation: Exfoliating 1-2 times a week removes dead skin cells, revealing a brighter, more even-toned complexion. This step enhances makeup application by allowing for smoother product glide and a more polished finish.
Moisturization:
- Hydration is Key: Applying a moisturizer tailored to your skin type is essential for maintaining hydration and achieving a dewy, healthy glow. This step creates a barrier that prevents makeup from clinging to dry patches and promotes a smooth, even application.
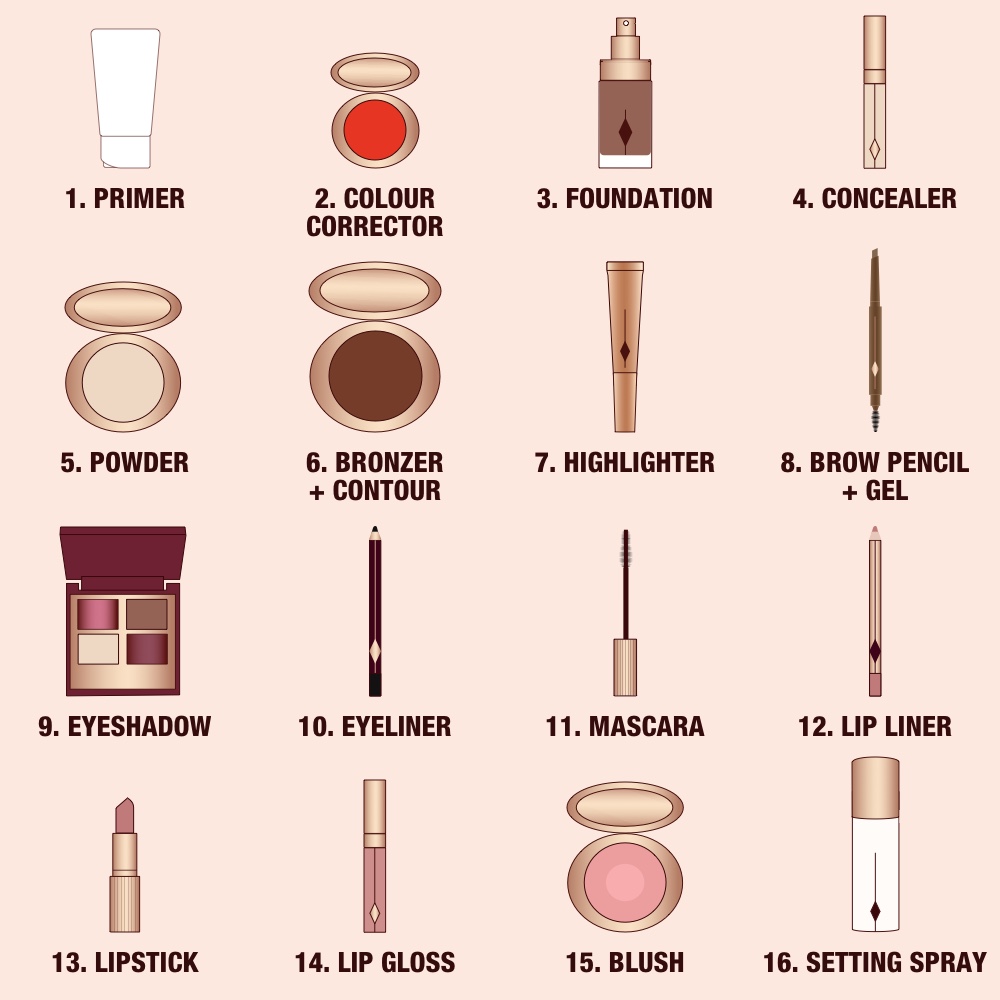
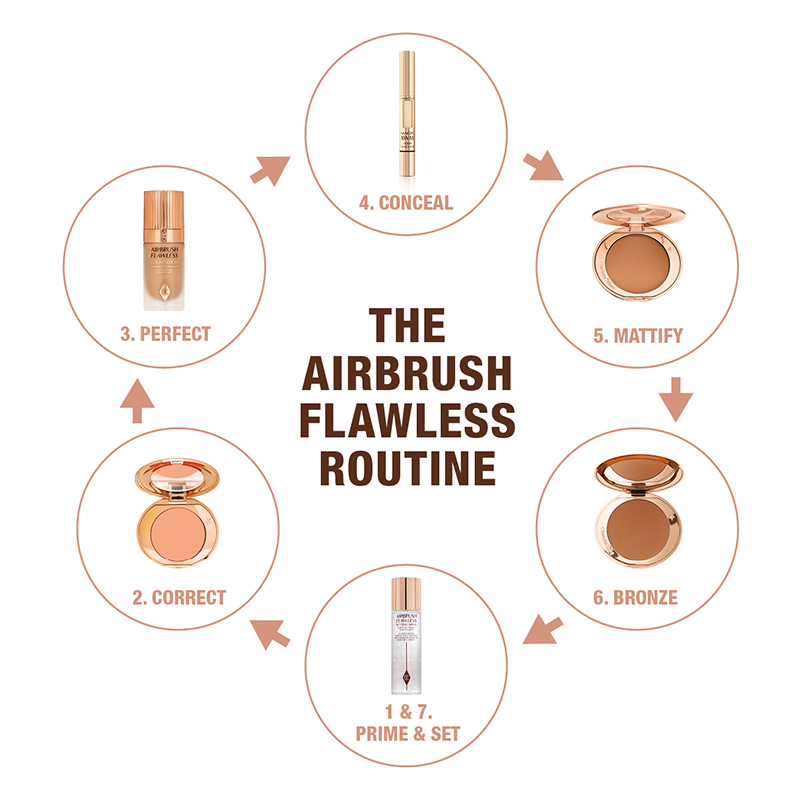
- Primer for Longevity: A primer acts as a shield between skin and makeup, helping to minimize the appearance of pores, fine lines, and wrinkles. It also creates a smooth surface for makeup application, extending its wear time and enhancing its overall effect.
Step 2: Foundation – The Canvas for Your Look
Foundation, a key element of makeup, provides an even base for subsequent products, unifying skin tone and creating a flawless canvas.
Choosing the Right Foundation:
- Finding Your Match: Selecting a foundation that perfectly matches your skin tone is paramount. The ideal shade should blend seamlessly into your natural skin color, without leaving any noticeable lines or streaks.
- Consider Your Skin Type: Opt for a foundation formula that complements your skin type. For oily skin, mattifying or oil-free formulas are recommended, while dry skin benefits from hydrating or dewy finishes.
Application Techniques:
- Sponges, Brushes, or Fingers: Various tools can be employed for foundation application, each with its own benefits. Sponges provide a seamless, blended finish, brushes deliver precise coverage, and fingers offer a warmer, more natural application.
- Building Coverage Gradually: Apply foundation in thin layers, gradually building coverage as needed. This technique ensures a natural-looking finish and prevents a cakey appearance.
Step 3: Concealer – Masking Imperfections
Concealer plays a vital role in minimizing imperfections, brightening the under-eye area, and enhancing overall complexion.
Choosing the Right Concealer:
- Color Correction: Concealers come in various shades to address specific concerns. Green conceals redness, yellow masks purple tones, and peach counteracts dark circles.
- Coverage and Finish: Selecting the right coverage and finish depends on individual preferences. Full coverage conceals blemishes effectively, while light coverage provides a more natural look.
Application Techniques:
- Triangle Technique: Applying concealer in an inverted triangle shape under the eyes brightens the area and minimizes the appearance of dark circles.
- Dabbing and Blending: Dab concealer onto blemishes or areas requiring coverage, then gently blend it into the surrounding skin for a seamless transition.
Step 4: Eyeshadow – Adding Depth and Dimension
Eyeshadow, a versatile tool for enhancing eye shape and adding color, offers a range of possibilities for expressing creativity.
Choosing the Right Eyeshadow Palette:
- Color Harmony: Select eyeshadow shades that complement your eye color and skin tone. Warm tones generally flatter brown eyes, cool tones enhance blue eyes, and neutral shades suit most eye colors.
- Matte and Shimmer Finishes: Matte eyeshadows provide a soft, diffused look, while shimmer shades add dimension and luminosity.
Application Techniques:
- Blending is Key: Apply eyeshadow with a soft, fluffy brush, blending the edges to create a seamless transition between colors.
- Layering for Depth: Use lighter shades on the brow bone and inner corners, transitioning to darker shades on the crease and outer corners for added depth.
Step 5: Eyeliner – Defining the Eye Contour
Eyeliner defines the eye shape, emphasizing the lash line and creating a dramatic or subtle effect.
Choosing the Right Eyeliner:
- Pencil, Liquid, or Gel: Pencil eyeliners offer a softer, more forgiving application, liquid eyeliners create precise lines, and gel eyeliners provide a blend of control and intensity.
- Color Options: Black eyeliner is a classic choice, while brown or navy can create a softer, more natural look. Colored eyeliners add a pop of color and can be used to complement eye color.
Application Techniques:
- Thin Line for Subtlety: Apply a thin line along the upper lash line for a subtle enhancement.
- Winged Liner for Drama: Create a winged liner by extending the line beyond the outer corner of the eye, creating a dramatic and alluring effect.
Step 6: Mascara – Enhancing Lash Volume and Length
Mascara defines and volumizes lashes, adding a touch of drama and enhancing the overall eye look.
Choosing the Right Mascara:
- Volume, Length, or Definition: Select a mascara that addresses your desired lash effect. Volumizing mascaras add thickness, lengthening mascaras extend lashes, and defining mascaras separate and lift lashes.
- Waterproof or Regular: Waterproof mascara is ideal for long-lasting wear, while regular mascara is suitable for everyday use.
Application Techniques:
- Wiggle and Lift: Apply mascara with a zig-zag motion from the base of the lashes to the tips, lifting and separating lashes for a fuller, more defined look.
- Multiple Coats for Extra Volume: Apply multiple coats of mascara for a dramatic, voluminous effect.
Step 7: Blush – Adding a Flush of Color
Blush adds a natural-looking flush of color to the cheeks, enhancing the complexion and creating a youthful glow.
Choosing the Right Blush:
- Color Harmony: Select a blush shade that complements your skin tone. Pink and peach shades flatter most skin tones, while coral and bronze shades add warmth.
- Finish and Texture: Cream blushes provide a dewy, natural finish, while powder blushes offer a more matte effect.
Application Techniques:
- Apple of the Cheeks: Apply blush to the apples of your cheeks, blending upwards towards the temples for a natural, flushed effect.
- Contouring with Blush: Use a darker blush shade to sculpt and contour the cheekbones, adding definition and dimension.
Step 8: Bronzer – Adding Warmth and Definition
Bronzer adds warmth and dimension to the complexion, creating a sun-kissed glow and enhancing facial structure.
Choosing the Right Bronzer:
- Complementary Shade: Select a bronzer shade that is one to two shades darker than your natural skin tone.
- Matte or Shimmer: Matte bronzers create a natural, sculpted look, while shimmer bronzers add luminosity and a sun-kissed glow.
Application Techniques:
- Contouring: Apply bronzer along the cheekbones, jawline, and temples to define facial structure and create a sculpted look.
- Bronzing: Apply bronzer to the forehead, nose, and chin to create a warm, sun-kissed glow.
Step 9: Setting Powder – Locking in the Look
Setting powder is a finishing touch that helps to set makeup, absorbing excess oil and preventing shine.
Choosing the Right Setting Powder:
- Translucent or Colored: Translucent setting powder is suitable for all skin tones, while colored setting powder can be used to match or complement skin tone.
- Matte or Dewy: Matte setting powder creates a flawless, matte finish, while dewy setting powder adds a subtle glow.
Application Techniques:
- Light Application: Use a large, fluffy brush to apply a light layer of setting powder over the entire face, focusing on areas prone to shine.
- Baking: Apply a generous amount of setting powder to areas prone to shine, such as the under-eye area and T-zone, and allow it to "bake" for a few minutes before brushing off the excess.
Step 10: Lip Color – Adding a Pop of Color
Lip color completes the makeup look, adding a touch of vibrancy and enhancing the overall aesthetic.
Choosing the Right Lip Color:
- Complementary Shades: Select a lip color that complements your skin tone and eye color. Bright shades like red and pink create a bold statement, while nude shades offer a subtle enhancement.
- Finish and Texture: Matte lipsticks create a classic, polished look, while glosses add shine and dimension.
Application Techniques:
- Lip Liner for Definition: Use a lip liner to define the lip shape and prevent lipstick from bleeding.
- Even Application: Apply lipstick evenly to both lips, starting from the center and working towards the edges.
FAQs by Makeup Routine Step by Step
Step 1: Skin Preparation
Q: What is the best way to cleanse my skin?
A: Choose a gentle cleanser suited to your skin type. Apply it with your fingertips or a soft washcloth, massaging it into your skin in circular motions. Rinse thoroughly with lukewarm water and pat your skin dry with a clean towel.
Q: How often should I exfoliate?
A: Exfoliating 1-2 times per week is generally sufficient for most skin types. However, individuals with sensitive skin should exfoliate less frequently or use a gentle exfoliator.
Q: What are the benefits of using a primer?
A: A primer helps to minimize the appearance of pores, fine lines, and wrinkles, creating a smooth surface for makeup application. It also extends the wear time of makeup and enhances its overall effect.
Step 2: Foundation
Q: How do I find my perfect foundation shade?
A: Test foundation shades on your jawline, blending them into your natural skin tone. The ideal shade should blend seamlessly without leaving any noticeable lines or streaks.
Q: What is the difference between matte and dewy foundation finishes?
A: Matte foundation finishes provide a flawless, shine-free look, while dewy foundation finishes create a luminous, radiant complexion.
Step 3: Concealer
Q: How do I choose the right concealer shade?
A: Select a concealer shade that matches your skin tone or is one shade lighter to brighten the under-eye area. For color correction, use specific shades to address individual concerns.
Q: What is the best way to apply concealer under the eyes?
A: Apply concealer in an inverted triangle shape under the eyes, blending it outwards and upwards for a seamless transition.
Step 4: Eyeshadow
Q: What are the best eyeshadow colors for my eye color?
A: Warm tones generally flatter brown eyes, cool tones enhance blue eyes, and neutral shades suit most eye colors.
Q: How do I blend eyeshadow effectively?
A: Use a soft, fluffy brush to apply eyeshadow, blending the edges to create a seamless transition between colors.
Step 5: Eyeliner
Q: What is the best eyeliner for beginners?
A: Pencil eyeliner is a good option for beginners, as it offers a softer, more forgiving application.
Q: How do I create a winged eyeliner?
A: Start by applying a thin line along the upper lash line, then extend the line beyond the outer corner of the eye, creating a wing shape.
Step 6: Mascara
Q: How do I apply mascara without clumps?
A: Apply mascara with a zig-zag motion from the base of the lashes to the tips, lifting and separating lashes for a fuller, more defined look.
Q: How do I remove waterproof mascara?
A: Use a gentle oil-based makeup remover or a waterproof mascara remover to effectively remove waterproof mascara.
Step 7: Blush
Q: What is the best blush color for my skin tone?
A: Pink and peach shades flatter most skin tones, while coral and bronze shades add warmth.
Q: How do I apply blush for a natural look?
A: Apply blush to the apples of your cheeks, blending upwards towards the temples for a natural, flushed effect.
Step 8: Bronzer
Q: How do I choose the right bronzer shade?
A: Select a bronzer shade that is one to two shades darker than your natural skin tone.
Q: How do I use bronzer to contour my face?
A: Apply bronzer along the cheekbones, jawline, and temples to define facial structure and create a sculpted look.
Step 9: Setting Powder
Q: What is the difference between translucent and colored setting powder?
A: Translucent setting powder is suitable for all skin tones, while colored setting powder can be used to match or complement skin tone.
Q: How do I apply setting powder without looking cakey?
A: Use a large, fluffy brush to apply a light layer of setting powder over the entire face, focusing on areas prone to shine.
Step 10: Lip Color
Q: What is the best lip color for my skin tone?
A: Bright shades like red and pink create a bold statement, while nude shades offer a subtle enhancement.
Q: How do I prevent lipstick from bleeding?
A: Use a lip liner to define the lip shape and prevent lipstick from bleeding.
Tips by Makeup Routine Step by Step
Step 1: Skin Preparation
- Cleanse Twice Daily: Cleanse your skin twice daily, morning and evening, to remove dirt, oil, and impurities.
- Exfoliate Regularly: Exfoliate 1-2 times per week to remove dead skin cells and promote cell turnover.
- Moisturize Consistently: Apply moisturizer to your skin after cleansing to maintain hydration and prevent dryness.
- Protect from the Sun: Use sunscreen with an SPF of 30 or higher daily to protect your skin from harmful UV rays.
Step 2: Foundation
- Match Your Skin Tone: Choose a foundation that perfectly matches your skin tone, blending seamlessly into your natural skin color.
- Apply in Thin Layers: Apply foundation in thin layers, gradually building coverage as needed to prevent a cakey appearance.
- Blend Thoroughly: Blend foundation thoroughly with a sponge, brush, or fingertips, ensuring a seamless transition between skin and makeup.
- Set with Powder: Set foundation with a translucent or colored setting powder to lock in the look and prevent shine.
Step 3: Concealer
- Choose the Right Shade: Select a concealer shade that matches your skin tone or is one shade lighter to brighten the under-eye area.
- Apply in a Triangle Shape: Apply concealer in an inverted triangle shape under the eyes, blending it outwards and upwards for a seamless transition.
- Dab and Blend: Dab concealer onto blemishes or areas requiring coverage, then gently blend it into the surrounding skin for a natural finish.
- Set with Powder: Set concealer with a translucent or colored setting powder to prevent creasing and extend wear time.
Step 4: Eyeshadow
- Prime Your Eyelids: Apply an eyeshadow primer to your eyelids to create a smooth surface for eyeshadow application and enhance its longevity.
- Blend, Blend, Blend: Blend eyeshadows thoroughly to create a seamless transition between colors and prevent harsh lines.
- Use a Variety of Brushes: Employ different brushes for applying and blending eyeshadow, achieving a variety of effects.
- Experiment with Color: Explore different eyeshadow palettes and shades to find colors that complement your eye color and skin tone.
Step 5: Eyeliner
- Sharpen Your Pencil: Sharpen your pencil eyeliner regularly for a precise application.
- Start with a Thin Line: Apply a thin line along the upper lash line and gradually build intensity as desired.
- Use a Steady Hand: Practice applying eyeliner with a steady hand to achieve a clean and precise line.
- Tightline for a Subtle Enhancement: Apply eyeliner to the waterline for a subtle enhancement that makes lashes appear thicker.
Step 6: Mascara
- Wiggle and Lift: Apply mascara with a zig-zag motion from the base of the lashes to the tips, lifting and separating lashes for a fuller, more defined look.
- Avoid Pumping the Wand: Pumping the wand introduces air into the mascara tube, which can cause clumps and dry out the product.
- Curl Your Lashes: Curl your lashes before applying mascara to enhance their curl and create a more dramatic effect.
- Remove Excess Mascara: Wipe off excess mascara from the wand before applying it to your lashes to prevent clumps.
Step 7: Blush
- Apply to the Apples of Your Cheeks: Apply blush to the apples of your cheeks, blending upwards towards the temples for a natural, flushed effect.
- Use a Light Hand: Start with a light application of blush and gradually build color as desired.
- Blend Thoroughly: Blend blush thoroughly with a brush or sponge, ensuring a seamless transition into the surrounding skin.
- Consider Your Skin Tone: Select a blush shade that complements your skin tone, enhancing your natural complexion.
Step 8: Bronzer
- Apply to Contour Points: Apply bronzer along the cheekbones, jawline, and temples to define facial structure and create a sculpted look.
- Blend Carefully: Blend bronzer thoroughly to avoid harsh lines and create a natural, sun-kissed effect.
- Use a Light Hand: Start with a light application of bronzer and gradually build color as desired.
- Consider Your Skin Tone: Select a bronzer shade that is one to two shades darker than your natural skin tone.
Step 9: Setting Powder
- Apply with a Large Brush: Use a large, fluffy brush to apply setting powder over the entire face, focusing on areas prone to shine.
- Use a Light Hand: Apply a light layer of setting powder to prevent a cakey appearance.
- Set with a Sponge: Use a damp sponge to press setting powder into the skin for a flawless, long-lasting finish.
- Consider Your Skin Type: Choose a setting powder that matches your skin type, whether it’s matte or dewy.
Step 10: Lip Color
- Exfoliate Your Lips: Exfoliate your lips with a lip scrub or a soft toothbrush to remove dead skin cells and create a smooth surface for lipstick application.
- Use a Lip Liner: Use a lip liner to define the lip shape and prevent lipstick from bleeding.
- **Apply Lipstick Evenly


Closure
Thus, we hope this article has provided valuable insights into The Art of Application: A Comprehensive Guide to a Step-by-Step Makeup Routine. We appreciate your attention to our article. See you in our next article!