Mastering UV Mapping in Blender: A Complete Information
Associated Articles: Mastering UV Mapping in Blender: A Complete Information
Introduction
With enthusiasm, let’s navigate by means of the intriguing subject associated to Mastering UV Mapping in Blender: A Complete Information. Let’s weave attention-grabbing info and provide recent views to the readers.
Desk of Content material
Mastering UV Mapping in Blender: A Complete Information

UV mapping is an important step within the 3D modeling pipeline, bridging the hole between the 3D world and the 2D world of textures. In Blender, this course of lets you challenge a 2D picture onto a 3D mannequin, giving it practical element, coloration, and floor properties. With out correct UV mapping, your textures will seem stretched, distorted, or in any other case incorrectly utilized, ruining the visible attraction of your meticulously crafted mannequin. This text will delve into the intricacies of UV mapping in Blender, overlaying all the pieces from the fundamentals to superior strategies.
Understanding UV Coordinates:
Earlier than diving into the Blender workflow, it is important to know the idea of UV coordinates. Consider them as a mapping system that interprets 3D floor factors onto a 2D airplane. ‘U’ and ‘V’ symbolize the horizontal and vertical axes of this airplane, respectively, analogous to the ‘X’ and ‘Y’ axes within the 3D house. Every vertex in your 3D mannequin is assigned a singular UV coordinate, figuring out the place its corresponding pixel might be situated on the 2D texture picture. The UV map itself is basically a 2D illustration of your 3D mannequin’s floor, unrolled and flattened.
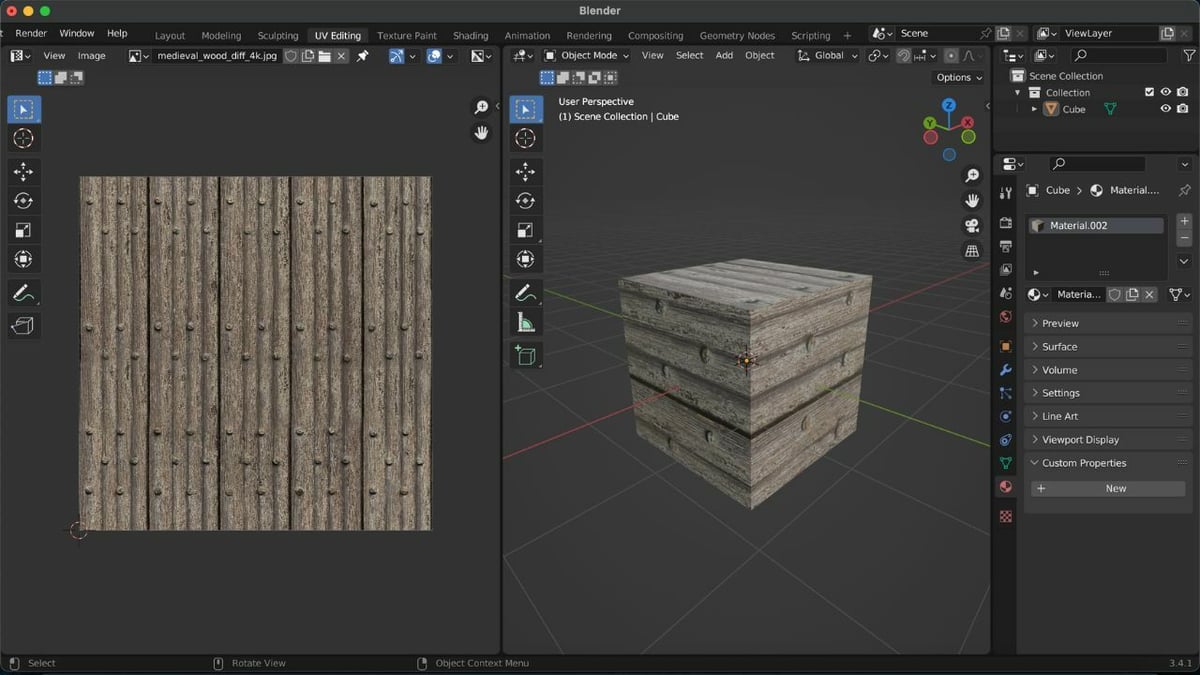
The UV Enhancing Workspace in Blender:
Blender gives a devoted UV Enhancing workspace for managing and manipulating UV maps. To entry it, choose your object within the 3D viewport, then change to the "UV Enhancing" workspace from the workspace switcher on the high of the display. This workspace gives a number of instruments particularly designed for UV manipulation, together with:
- UV choice instruments: These instruments help you choose particular person UV islands, seams, or vertices, enabling exact management over the UV format.
- Rework instruments: These instruments (translate, rotate, scale) help you transfer, rotate, and resize chosen UV islands, essential for adjusting the feel placement and proportions.
- Stitching instruments: These instruments join separate UV islands, helpful for creating seamless textures throughout completely different components of a mannequin.
- UV unwrapping instruments: These are the core instruments used to generate the preliminary UV format out of your 3D mannequin’s geometry.
Completely different UV Unwrapping Strategies:
Blender gives a wide range of UV unwrapping strategies, every with its strengths and weaknesses. The selection of methodology relies upon closely on the mannequin’s complexity and the specified degree of texture distortion. Listed here are some generally used strategies:
-
Sensible UV Challenge: It is a versatile and infrequently really useful start line, particularly for comparatively easy fashions. It intelligently initiatives the UVs onto the mannequin’s faces, minimizing distortion. It is notably good for fashions with comparatively planar surfaces.
-
Challenge from View: This methodology initiatives the UVs primarily based on the present digital camera view. It is helpful for objects with a transparent "entrance" face, minimizing distortion on that face. Nevertheless, different faces may endure from vital distortion.
-
Unwrap: It is a extra subtle methodology that makes an attempt to unfold the 3D mannequin’s floor onto a 2D airplane with minimal distortion. It is usually the popular methodology for advanced fashions with many faces and irregular shapes. It makes use of algorithms to seek out the absolute best format, however may require guide changes afterward.
-
Dice Projection: This methodology initiatives the UVs onto a dice that surrounds the item. That is easy and quick however usually leads to vital distortion, particularly on curved surfaces. It’s best suited for easy box-like fashions.
-
Cylinder Projection: Just like dice projection, however initiatives onto a cylinder. Helpful for objects with cylindrical shapes, minimizing distortion alongside the cylindrical axis.
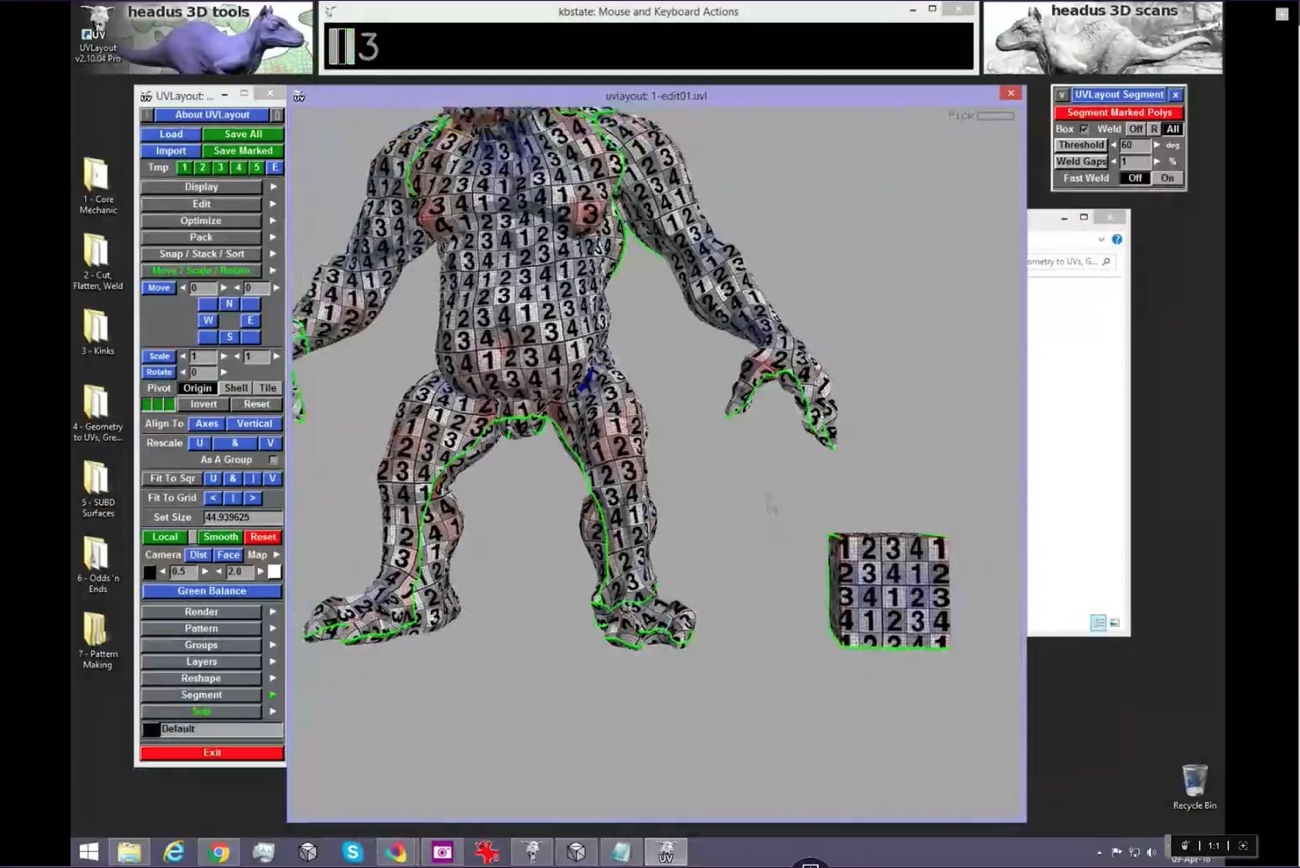
Seams and UV Islands:
Understanding seams and UV islands is essential for efficient UV mapping. Seams are edges in your 3D mannequin that outline the place the UV map might be "minimize" and "unfolded." They’re important for stopping distortion, notably on advanced curved surfaces. Correct seam placement is a key talent that comes with observe and expertise. After unwrapping, the mannequin’s floor is split into UV islands, every equivalent to a linked part of the mannequin’s geometry.
Handbook UV Enhancing and Adjustment:
Even with the perfect automated unwrapping methodology, guide changes are sometimes essential to optimize the UV format. This entails utilizing the rework instruments to reposition, rotate, and scale UV islands to attain a extra environment friendly and fewer distorted texture mapping. This step is essential for minimizing texture stretching and guaranteeing even distribution of the feel throughout the mannequin’s floor.
Packing UV Islands:
As soon as the UV islands are unwrapped and adjusted, they have to be packed collectively effectively within the UV house. That is carried out to attenuate wasted house within the texture picture, permitting for higher-resolution textures. Blender gives instruments for automated packing, however guide changes could be required for optimum outcomes.
Working with A number of UV Maps:
Blender lets you create a number of UV maps for a single object. That is notably helpful when making use of completely different textures to completely different components of the mannequin or utilizing completely different mapping strategies for particular particulars. For instance, you may use one UV map for the principle physique texture and one other for an in depth regular map.
Baking Textures:
As soon as the UV map is finalized, you need to use Blender’s baking performance to generate numerous texture maps out of your 3D mannequin. This entails "baking" info like diffuse coloration, regular maps, ambient occlusion, and extra onto the 2D texture photographs. This course of makes use of the UV map to find out how the knowledge is projected from the 3D mannequin onto the 2D texture.
Superior Strategies:
- Seamless Textures: Creating seamless textures requires cautious planning of seams and UV format to make sure that the feel repeats seamlessly throughout the sides of the UV islands.
- Atlasing: This entails combining a number of UV maps right into a single massive texture atlas, enhancing texture loading effectivity.
- Weight Portray: For advanced fashions, weight portray can be utilized to manage the affect of various UV maps on completely different components of the mannequin.
Troubleshooting Frequent Points:
- Distorted Textures: This usually signifies poor seam placement or inefficient UV format. Re-evaluate your seam placement and modify the UV islands accordingly.
- Lacking Textures: This might be resulting from incorrect UV mapping, lacking texture information, or incorrect materials settings. Double-check your UV map, texture paths, and materials settings.
- Black Areas in Textures: This usually signifies areas of your mannequin that aren’t correctly assigned UV coordinates. Test for unfastened geometry or gaps in your UV map.
Mastering UV mapping in Blender takes time and observe. Experiment with completely different unwrapping strategies, be taught to successfully place seams, and turn out to be snug with guide changes. By understanding the ideas and strategies outlined on this information, you’ll be able to considerably enhance the standard and realism of your 3D fashions and create gorgeous visuals on your initiatives. Do not forget that constant observe and experimentation are key to changing into proficient on this important side of 3D modeling.

Closure
Thus, we hope this text has supplied useful insights into Mastering UV Mapping in Blender: A Complete Information. We thanks for taking the time to learn this text. See you in our subsequent article!